
Vape Coils

It’s well known that vaping is healthier and less expensive than smoking cigarettes, but there are still expenses involved, such as purchasing e-liquids and replacement coils. Let’s look at ways to keep your vape device in top working order by choosing the right coil and using it correctly.
Choosing the perfect vape coil
The world of vaping in Australia is constantly evolving, and if you are new to vaping you will notice lots of different coils to choose from. However, you will need to pick the right coil for your vape tank, even if the brand is the same.
For example, an Innokin Zlide tank must be used with Zlide coils. Innokin Plex coils aren’t suited to Innokin Zlide. The same rule applies to most tanks - you need to use the specific coil designed for your vape device. Most tanks come with 2 coil types so you can choose your favourite. These 2 coils have different resistances measured in ohms. This resistance will determine the power required for successful vaping. The above example, Innokin Zlide, includes a 1.6ohm coil. Vape Store stocks dozens of high-quality coils from brands that include Vaporesso, Innokin, Uwell, Voopoo, Geekvape and Aspire.
Coil resistance
Vape coils can have higher or lower resistance, with dramatically different results for personalised vaping style.
Higher Resistance: The higher your coil resistance, the less power it requires. Higher resistance tank coils of 0.8ohm, 1.0ohm, 1.2ohm, for example, are great for mouth to lung vaping for an experience similar to smoking a cigarette. High resistance coils preserve battery life but produce less vapour.
Lower Resistance: Lower resistance coils such as 0.10ohm, 0.15ohm, 0.2ohm coils draw lots of power for creating massive vapour clouds. Lower resistance coils drain your battery faster, but deliver more full-flavoured e-juice vapour with every draw.
Vape Coil materials
There are two main types of coils used in vape devices - standard coils and mesh coils. Standard coils are made from wire that’s wound into a coil-shaped heating element. Mesh coils use mesh instead of wire. Mesh is renowned for providing more consistent heating that results in better flavour. Choose according to your own vaping style at Vape Store.
Another type of coil making inroads into the market are CCell coils made from porous ceramic material. Ceramic coils are often used to vape thicker e-liquids in smaller devices. They are also ideal for vaping CBD e-liquids. What does a coil do in a vape?
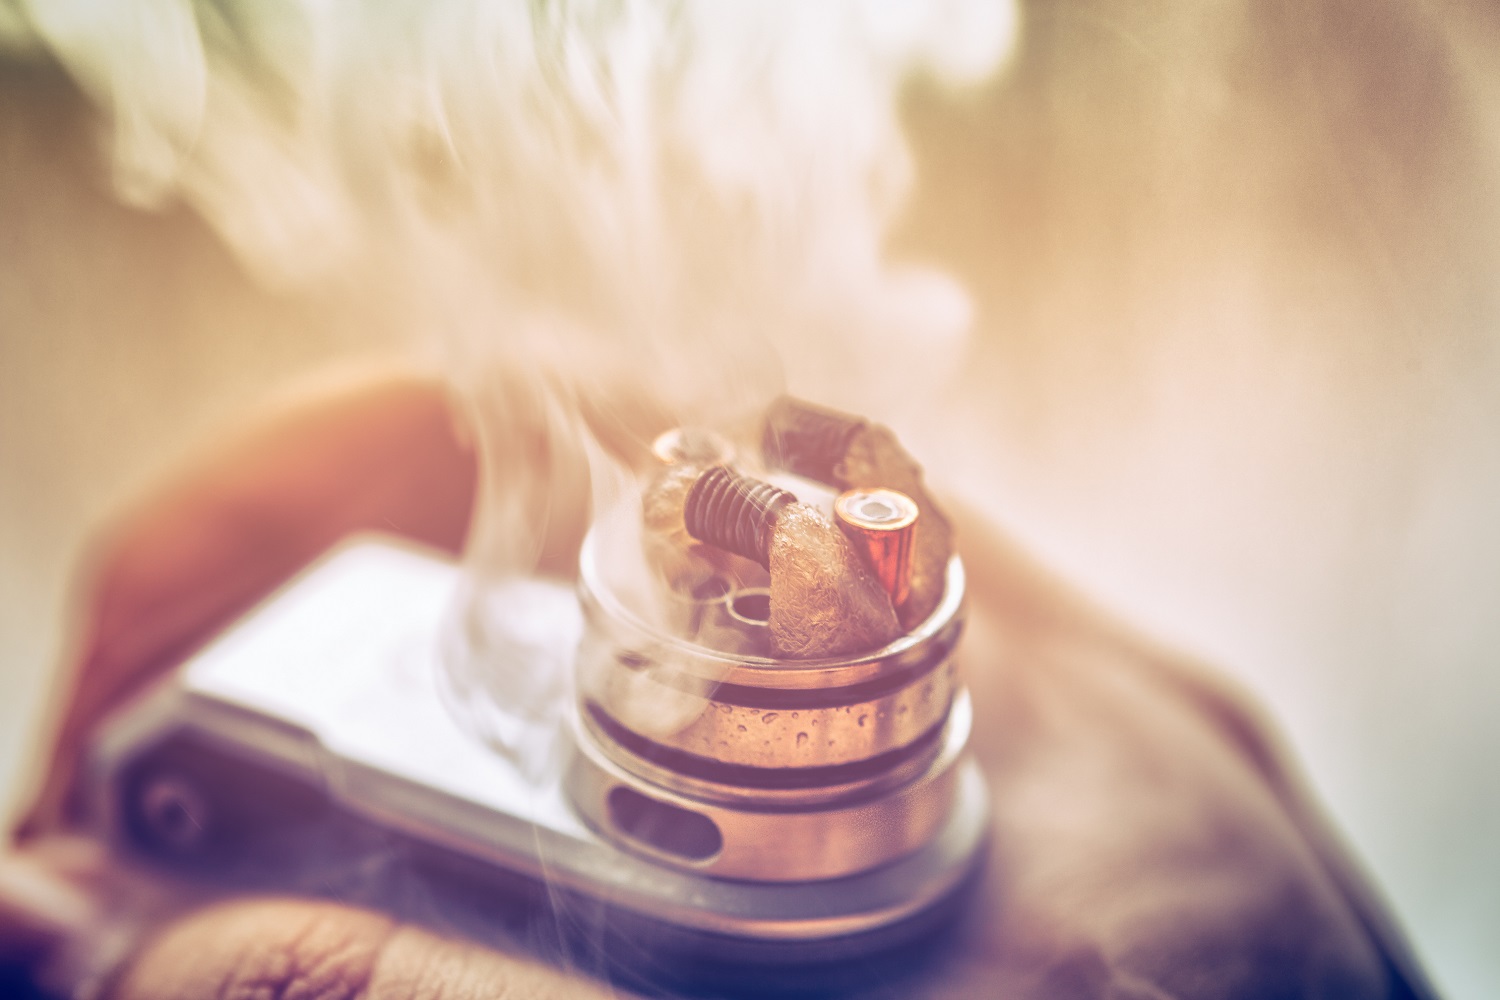
Vape coils are an essential component of e-cigarettes and vape devices. Coils are responsible for heating the e-liquid and turning it into vapour. The coil wraps around the device’s wicking material and is held in place by an atomizer head.
When you vape, the battery is engaged. This current heats up the wick and vaporizes the e-juice. The vapour then travels up the vape to the mouthpiece ready to inhale. Vape coils are ready-made and ready to go with your device, and they need to be replaced fairly regularly depending on how much you vape.
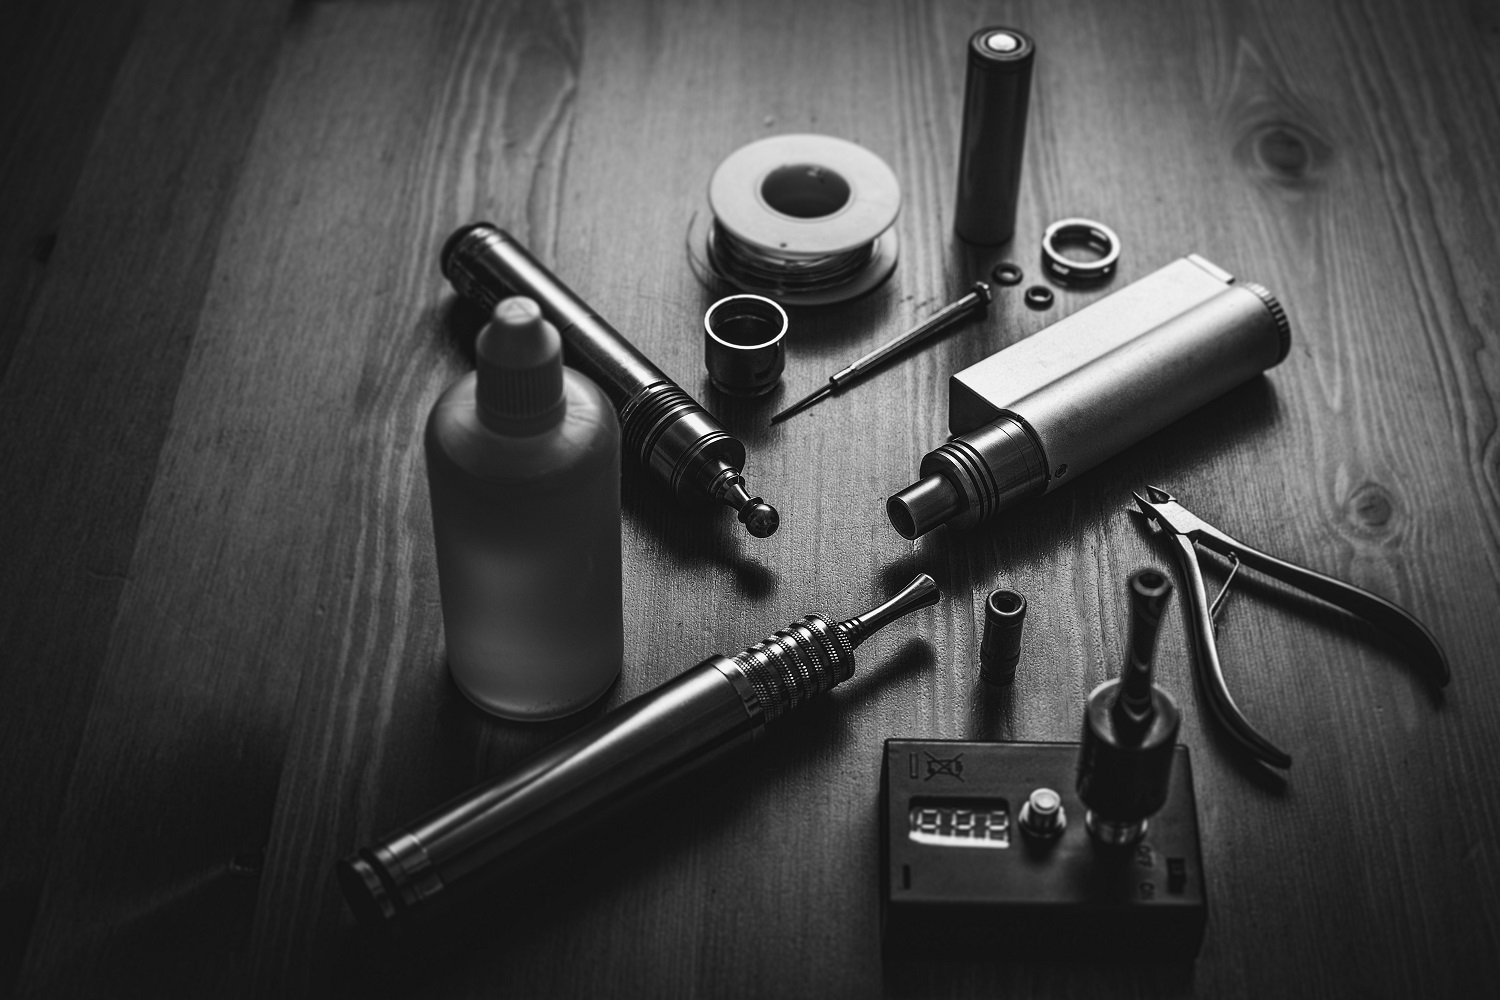
Experienced vapers who use mod kits for sub-ohm tank vaping often design their own DIY coil setups using special alloy wire and wick material manually fitted into their vape kit. Vape Store ready-made coils include:
• Geekvape Aegis Coil
Vape Store products include bottom vertical coils (BVC) for allowing advanced airflow from a virtually leak-free stainless steel tank for a satisfying vaping experience.
You can also choose from single coil devices that vaporize the e-liquid slowly and consume less power, or dual coil to vaporize quickly with more power to produce massive clouds.
How to replace the coil in a vape
Pod Systems and Tank Systems are two very popular vaping styles at Vape Store, and they are both easy to maintain in top working order. Here’s how the coils are changed.
Pod System
• When the pod is empty, remove it from the device and hold it upside down.
• Twist the pod’s base to remove it. Some vape pods insert directly rather than twist.
• Pull the used coil out of the pod.
• Push a replacement coil into the pod.
• Replace the base and refill the pod with your favourite e-juice.
Tank System
• When the tank is empty, remove it from the vape mod and hold it upside down.
• Twist the tank’s bottom (or push-pull) to remove it.
• Install a new coil by pushing it into the main body of the tank.
• Reassemble and refill the tank ready for use.
Priming replacement coils
Priming your replacement coil is the best way to make sure your wick is soaked with e-liquid and ready for your first inhale. Here’s how to prime the coil.
1: Find the juice holes on the coil head where the wicking material comes into contact with e-juice.
2: Drip several droplets of e-liquid onto the coil until the coil will not hold any more liquid.
3: Once you’re satisfied it’s soaked enough, add the coil to your device.
4: (optional) Draw from the vape kit without pressing the button to fully saturate the wick and coil.
5: Vape on a lower wattage for your first few vapes. Increase as necessary to your taste.
Many vape kits are equipped with auto-priming systems that automatically prime the vape coil.
Getting the most out of your coil
A well-functioning vape coil is important for a satisfying vaping experience. Here are some tips to ensure enjoyable vaping with every draw. Prime new coils before using: If you don’t prime your new coil before use, you run the risk of burning it out straight away.
Avoid burnt or dry hits: Always make sure there is enough e-juice in the system so the coil doesn’t start heating the wicking material.
Turn battery power down: Reducing the battery power setting can help extend your coil’s lifespan. Using a higher wattage will heat the coil up more.
Choose quality e-liquids: Cheap vape juice can contain sugary sweeteners that damage coils. Choose quality e-liquids from Vape Store for guaranteed vaping satisfaction.
Clean the coil often: If your coil starts looking unclean or vaping begins to taste funny, you may need to clean the coil.
• Remove the coil from the vape and blow out any excess juice that’s stuck-on.
• Rinse the coil with hot water if required.
• Ensure the coil is dry before reconnecting it to the battery.
• Heat the coil up to ensure your device is in top working order.

When to replace your vape coils
If you do not have enough e-liquid left in your tank, the wick will start vaporizing thin air and result in an unsatisfying burnt flavour. Your vape tank may have a minimum level indicator to guide you when vaping. It’s recommended to keep your vape kit reservoir topped up to at least the recommended fill line to reduce the chances of a dry hit.
How much do vape coils cost?
At Vape Store, we keep prices low. Our vape coils are the best in the business, yet they are all under $5 and some coils only cost around $2. Value for money is just one reason vapers choose Vape Store vape kits that include vape starter kits, advanced kits, pod vapes, batteries, chargers, sub ohm tanks, MTL tanks, replacement pod kits, rebuildable systems, coils, and a whole lot more vaping products.
At Vape Store, we also offer free delivery on orders over $75, so if you’re over 18 years of age and new to vaping, or are an experienced vaper, you will save by shopping at Vape Store. If shopping online, simply make a wishlist and proceed to checkout for convenient payment and speedy delivery to your door. Refer to our FAQs for more information about vaping and Vape Store products.